


C64 Joystick

After finding out, that arcade buttons and joysticks are available from ebay, AliExpress or other sales platforms, I started building my own joysticks. There are kits offered with a joystick, several buttons and a USB controller. So my first joystick was a USB joystick in a prefabricated enclosure, which can also be bought there. I just wanted to have a better one for theC64 mini.
Since my son prefers this joystick over the original, I decided to build one for the real C64. Since I did not have a 3D printer at that time, I have built it into an industrial case, which I have drilled holes for mounting the joystick and the buttons.
Since my son prefers this joystick over the original, I decided to build one for the real C64. Since I did not have a 3D printer at that time, I have built it into an industrial case, which I have drilled holes for mounting the joystick and the buttons.
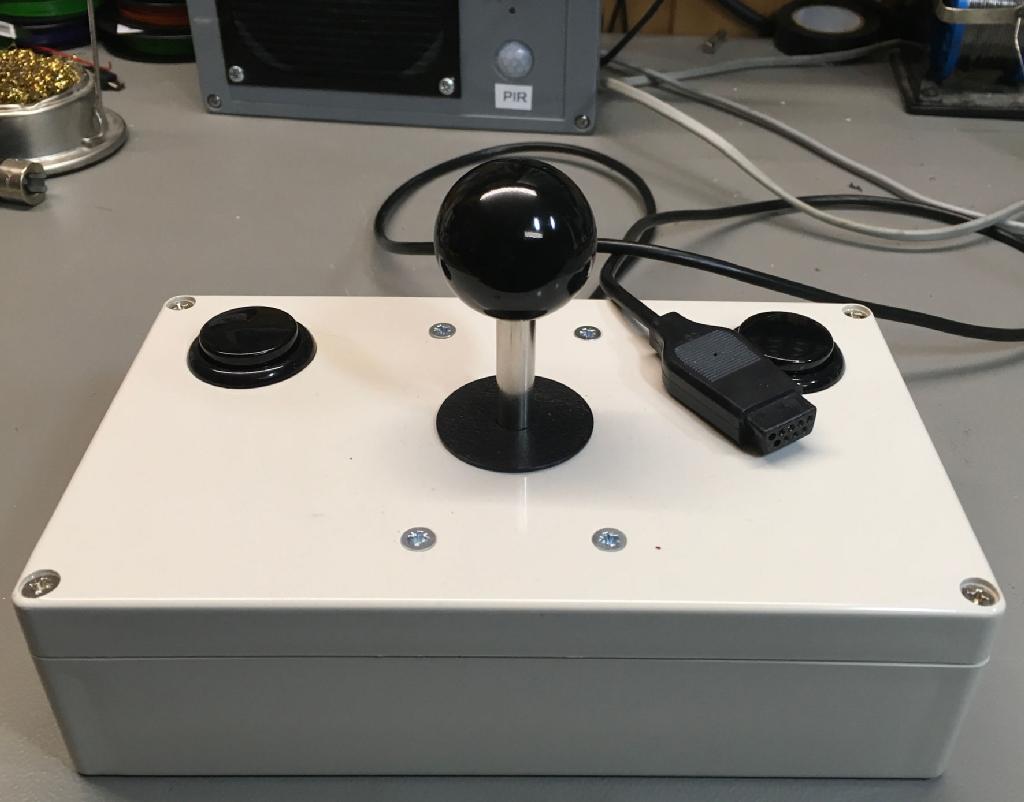
First attempt of using a an arcade joystick from AliExpress
My son claimed, that some games might be more fun, if you had buttons instead of the joystick, just like on a Game Boy. Postie brought some 24mm arcade buttons and I have installed them.
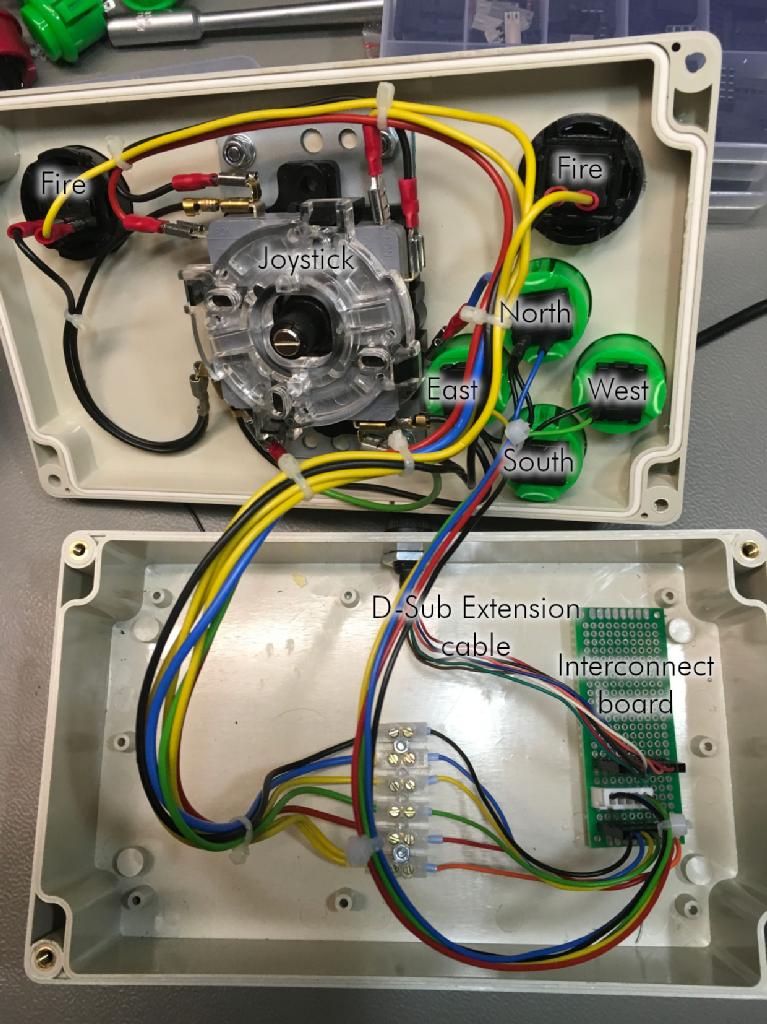
Inside the modified joystick
I already had an interconnect board made out of a perf board. I have intentionally left it a bit bigger, because it might come in handy to add a micro controller, like the (Arduino) pro micro for some rapid fire options.
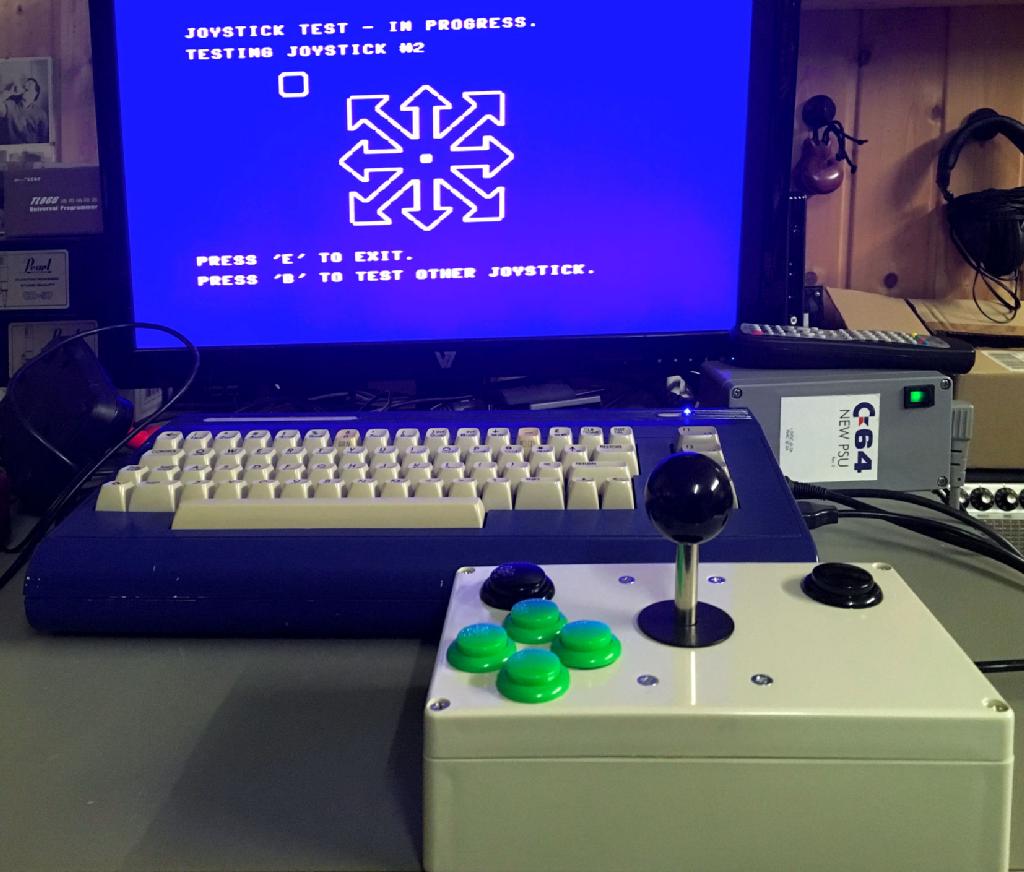
Testing the modified joystick
The Joysrtick was tested with a diagnostic program for the C64, which is integrated in the Final Cartridge III+. Other test routines can do the same, I am also using the Joytester II.
In autumn 2019, postie had to carry a huge parcel. In there was a mighty 3D printer (the Qidi X.-Plus). After tinkering a bit and learning Fusion 360, I felt, that it would be a nice challenge to construct a joystick case. There was still this ZIPPYY joystick in my drawer, that required usage, so I first 3D modelled it. While doing so, I have learned a bit, how it works and I liked it even more.
Then I have constructed the joystick case, which was definitely fun. I printed it out, which required about 11 hours in total (for all parts) and built it. I used the (magenta) filament, that was still on the printed and then we had a problem...
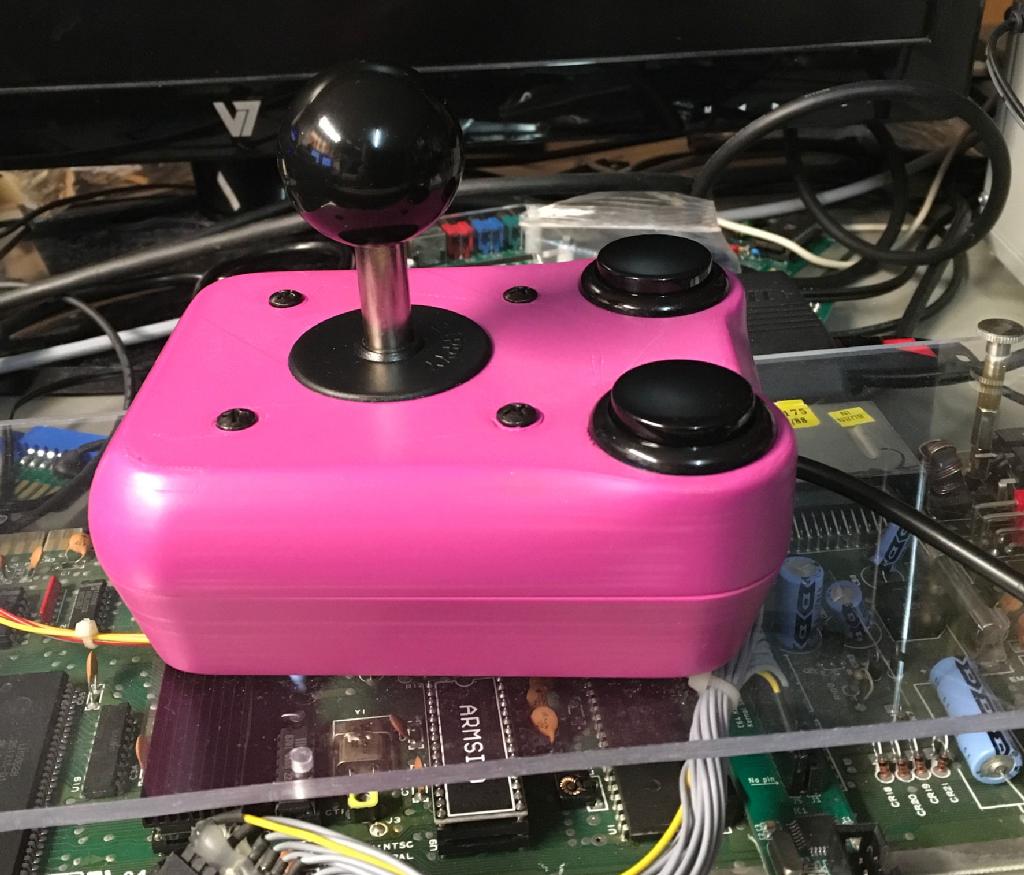
The pink joystick
It did not really meet the taste of my "audience". Well... I should have used another filament...
Other than that, the joystick plays well and is a good chunk for male hands (due to the size of the ZIPPYY stick, the enclosure for the joystick is 50mm high).
To create a joystick, that can be used for playing "Commando", not just "Bubble Bobble" (like the pink joystick, due to the color), I have bought some "military green" filament and yellow acrade buttons plus a ZIPPYY stick with a yellow ball knob. This somehow resembles things that I remember some military controls from back in the 1980s.
The "Commando" joystick (Fusion 360 rendering)
The "audience" was applauding me, so I knew, it was the way to go. I added some decals with the PF DIN stencil font and waited for the parts. Meanwhile, I was designing a "Simple Interconnect PCB", which would help to have a clean quality design, that could be built in mass production or at least built by somebody else (as free hardware).
Simple Interconnect PCB
Since I had to learn, that the wires of the joystick extension cable, which I was using, were too thin to be crimped with DuPont terminals, I have put some direct solder pads on this board. A quite good decision, since it makes soldering the cable quite simple.
Simple Interconnect PCB
The PCB provides a good way to separate the joystick and buttons from the joystick (D-Sub 9) cable. It reduces the change of unintentionally ripping off the fragile wires of this cable and also to connect it with a reduced likelyíhood of failure (dry solder joints included).
Joystick - Wiring completed
The result looks quite satisfying for me (as an engineer). The cable ties are great for bundling the wires, require a minute and don't cost a fortune.
Complete "battle hardened" joystick
I have printed the decal on a laser printable sticker foil (HERMA 4375), which is said to be permanent and which sticks quite well. I have used the same foil for the serial number label on the bottom side.
Now, I have added two more (alternative) top shells.

Three alternative top shells
The light blue lines show, how the mounting hole disance is measured. It is not hard to create alternavive top shells in Fusion 360. I have just copied the top shell component amnd pasted it with "paste new". Then I have modified the sketch and extruded "the other" holes instead of the original ("edit feature" in the time line).
Please find the details of the final joystick project on my github.