


Commodore Keyboard Tester
Some weeks ago, a friends showed me, what he had built on a perfboard to test his C64 keyboards. I immideately knew, what it was good for and how it is working and I thought: "Wow, such a good idea!".
Testing a C64 Keyboard
The Commodore computers, prior to the Amigas, have matrix keyboards. That means, every key is connected to one ROW and one COL(umn) signal.

The Keyboards can be scanned by the kernal this way.
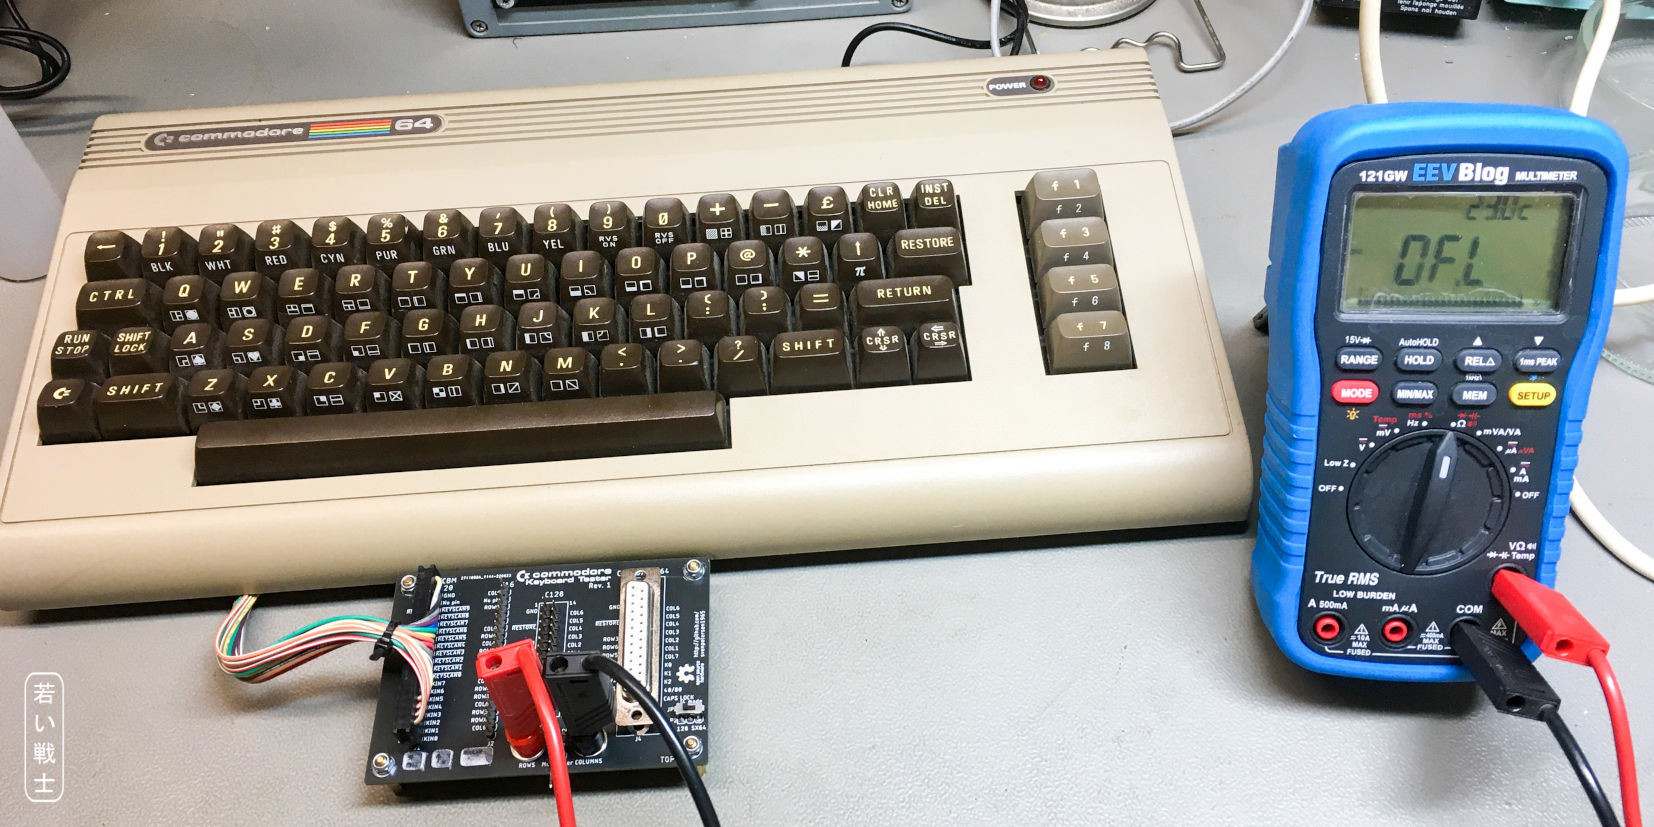
If you now connect all rows and all columns, you can measure the single key press by connecting an ohmmeter (multimeter) between the rows and the columns without disassembling the keyboards.
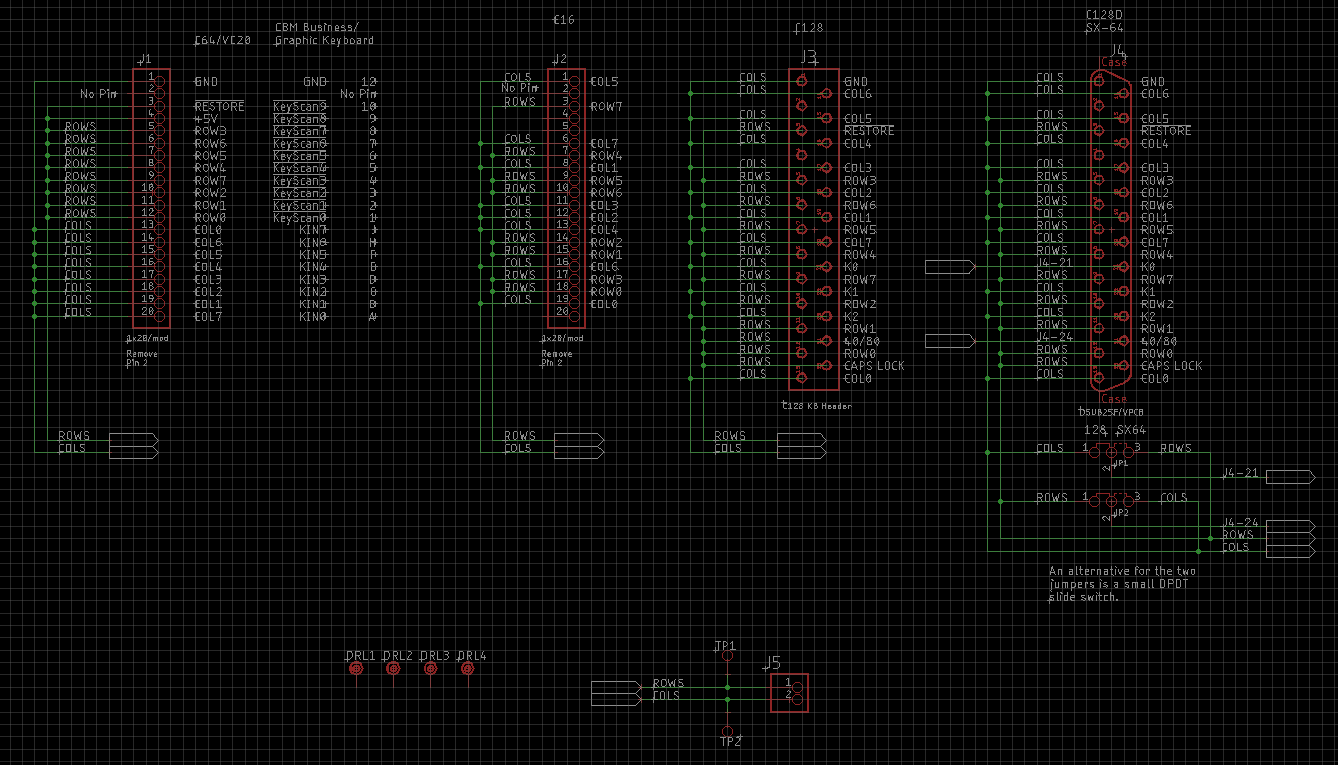
Schematics of the Keyboard Tester
The keyboard tester can test C64, VIC-20, PET&CBM keyboards and also C16, C128, C128D and SX-64 keyboards.
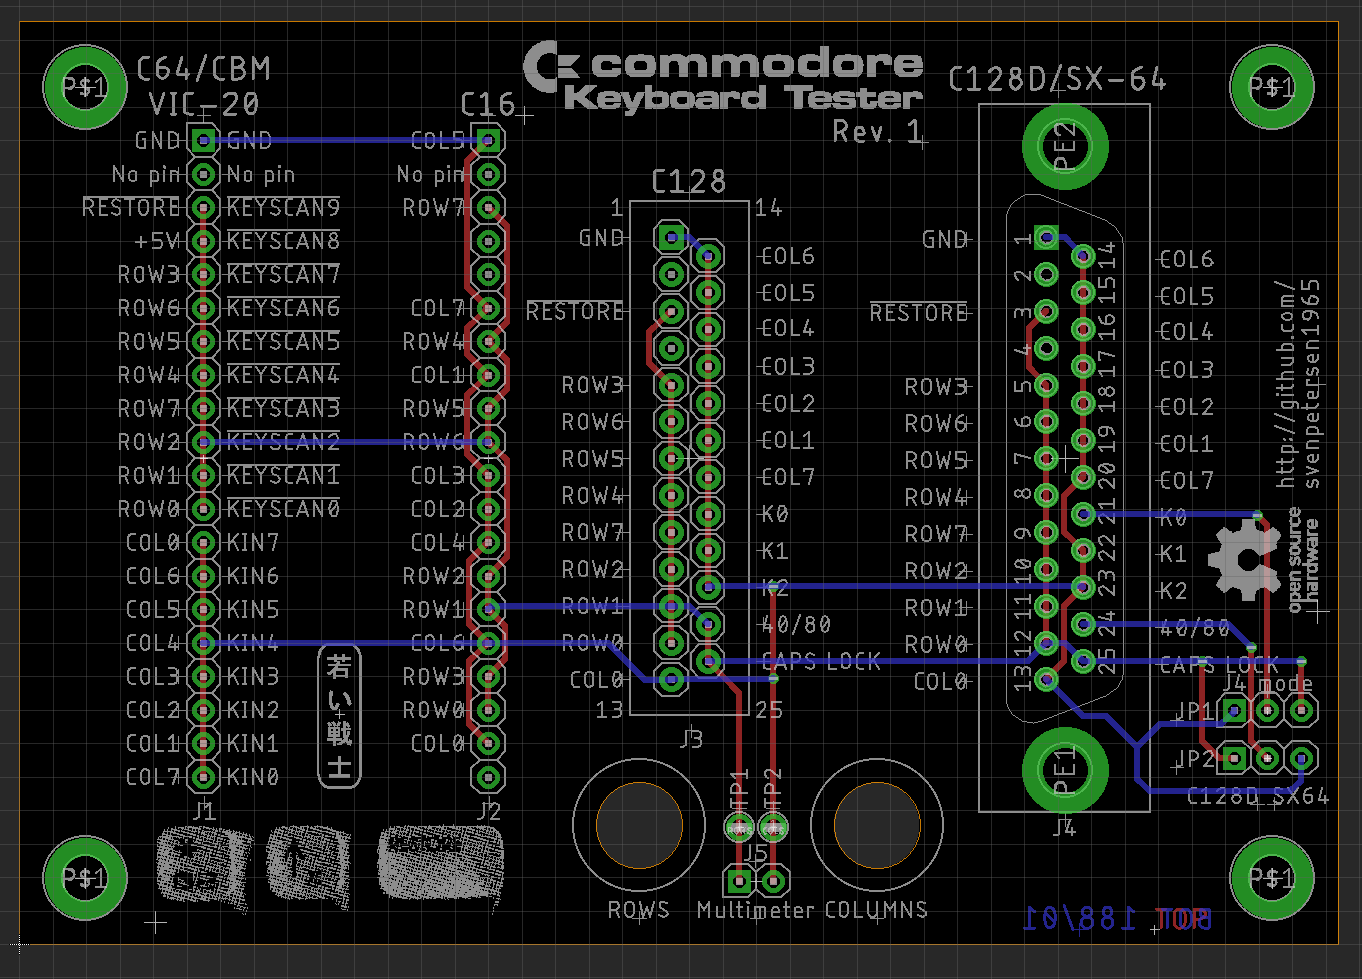
Layout of the Keyboard tester
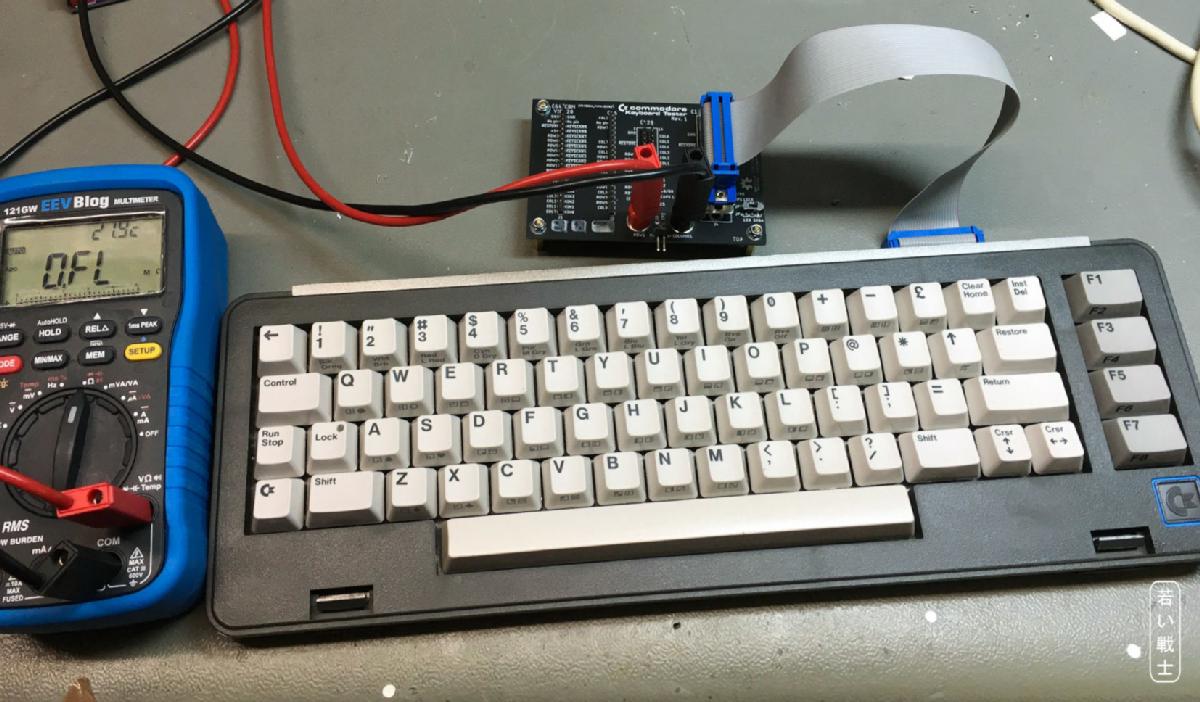
Testing an SX-64 keyboard
The SX-64 keyboard cable is not a regular female D-Sub 25 connector. However, a regular male D-Sub 25 fits on the keyboard connector. So a easy to produce ribbon cable can be used to fit the SX-64 keyboard with the keyboard tester (C128D D-Sub jack). The C128D Keyboard matrix is a bit different from the SX-64 keyboard matrix, but a simple jumper or switch can configure the D-Sub jack on the tester for either the C128D or the SX-64 keyboard.
It will be possible to make adapter boards for other retro computer (matrix) keyboards.
Usage
A multimeter is required for using this keyboard tester. A good impedance is between 0 ohms and a few 100 ohms. Probably, a keyboard works with even up to 3kohms, but I would consider it as critical. Also, the different computers use different interface chips (VIA, CIA etc.) and even scanning is a bit different, so the limit for “good” might be different. In my opinion, everything above 300ohms requires inspection. 2kohms might still work, though.
The keyboard is connected to the proper pin header, the multimeter is set to continuity test (“beeper”) mode or a low Ohms range. Every single key of the keyboard is pressed, one at a time and the value is read from the multimeter. If a key does not produce a reading in continuity test mode, switch to normal Ohms mode. This is slower, but sometimes the range in continuity test mode is too low to show a reading. The 121GW will display up to 550ohms, while the VC160 displays up to 400ohms in the continuity tester mode.
The measurement will be much faster, if the auto range mode is not used. A range of 2kB is a good choice here.
Find this project on github.